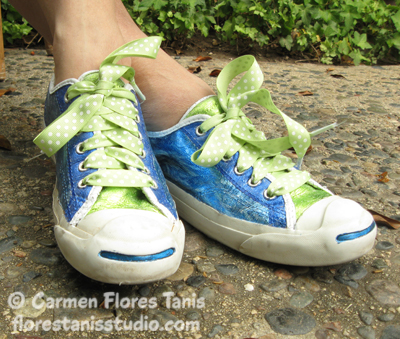
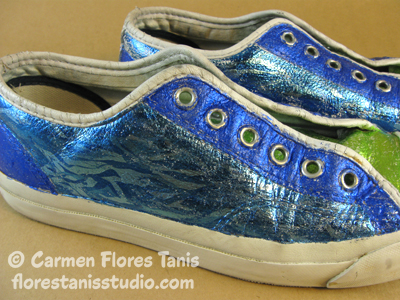
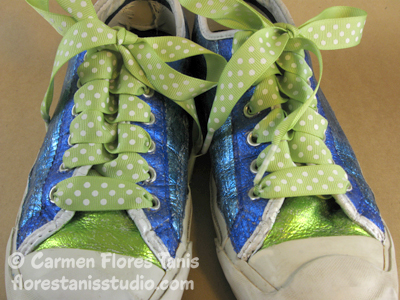
 I love sneakers! They are so comfortable and never go out of style. But once in a while they just need a little care and freshening up. I have a pair of white leather sneakers that although they still had life left in them, were just starting to look a little too tired. What to do? Kool Tak Foil sheets and 3D PVA glue to the rescue! This easy project will show you how to update and upcycle your own favorite kicks into a fun new pair of shoes with lots of glittery personality! Here’s how:
Materials / Tools:
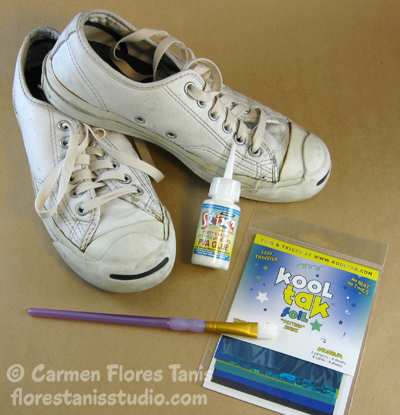
Kool Tak™ ShinyTransfer Foil Sheets – “Aquarium” Pattern series – three packages
Pair of Sneakers – (I used a favorite pair of leather ones)
Ribbon
Brush, fine grit sandpaper, scissors, paint pens – dark blue, white
Instructions:
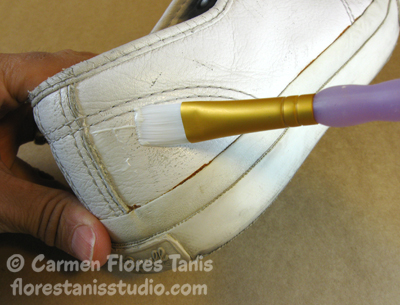
1. Remove the shoelaces from the sneakers and brush a coat of 3D PVA glue on the side heel sections. The wet glue is white, so wait a few minutes until it turns clear and tacky. (The reason to wait until the glue turns clear is that if you try to apply the foil while the glue is still wet, the glue will come off the shoe and stick to the foil sheet instead of the foil sticking to the shoe.)
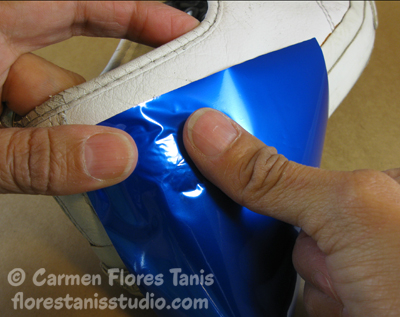
2. The shiny transfer foil sheet is basically a clear plastic release sheet with a dull side and a shiny side. The “Aquarium” package of shiny transfer foil sheets comes as an assortment of various cool colored solids and patterns. Select a royal blue foil sheet and press it shiny side up / dull side down onto the glue and rub well.
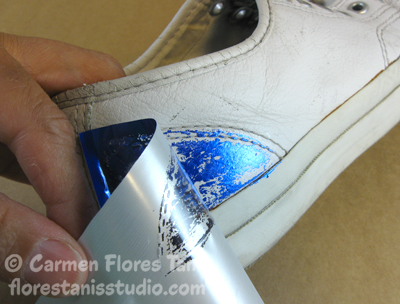
3. Lift and peel off the foil sheet. The clear plastic release sheet lifts off leaving the shiny foil adhered to the shoe! Magic! Depending on the grain of the leather sneakers, you may end up with areas where the foil did not adhere. Just brush on another coat of glue, let dry until clear and then continue to add foil until you are happy with the coverage. Do all four heel sections.
And don’t throw away the foil sheet! You can use every little bit of the foil on it until all you have left is the clear release sheet. *Tip – the glue will start to dry on the brush as you work, so wash your brush out with water every ten minutes or so to keep it nice and flexible.
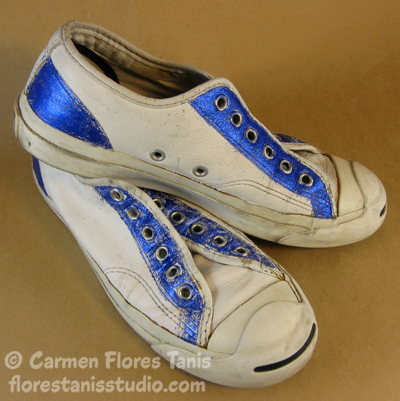
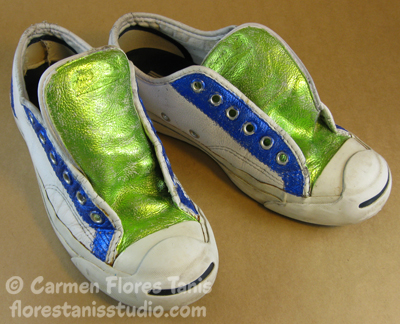
4. Apply glue and royal blue foil to the long eyelet areas and to the little blue rubber stripes at the toes.
5. Apply glue and lime green foil to the sneaker tongues.
6. Apply glue and blue water pattern foil to the sneaker sides.
7. Apply glue and blue hologram pattern foil to the strip at the back heels.
8. Use sandpaper to gently remove any excess foil and glue from the metal eyelets.
9. Add final details with the white and dark blue paint pens. (I outlined the blue sections and brightened up the white edging.)
10. Make new shoelaces by cutting two ribbons the same length as the old shoelaces. (*Tip – Roll up the ends of the laces and wrap with a little bit of clear tape to make them easier to insert through the eyelets.) Lace up and go show off your fun new tennies!
As far as care, Kool Tak foil applied with 3D PVA glue is water resistant but not water proof. So gently dab off (don’t rub) any water spots with a soft cloth and try not to jump in any puddles. Try this foiling technique using different colors, ribbons and other kinds of shoes like boots and pumps. With a few Kool Tak foils and 3D PVA glue, you can give your entire shoe collection a new look. Now that’s some happy feet!

Love these!!! Adorable!
I’m so glad you like them, Molly! It’s the KoolTak foil that makes them so fun!
Love these sneakers, Carmen!
Hi Beth! I’m so happy you like them! Glittery feet are happy feet!