
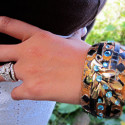
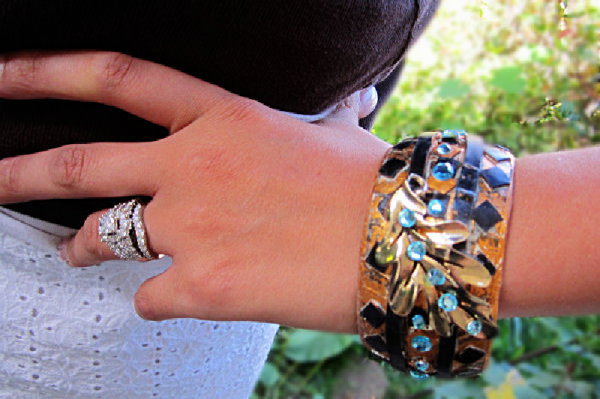
A simple plastic bracelet is transformed into a fun, fall fashion accessory with the use of Kool Tak™ products. This is a wonderful way to upcycle older bracelets into fashion-forward project.
Flea-market jewelry becomes the focal point on the new bracelet. Learn how to make a handmade bracelet with the following tutorial.
Materials
These measurements are for a 3-inch diameter bracelet. Measurements and amounts may vary with the size bracelet you use.
- Kool Tak™ Shiny Transfer Foil Sheets (Earth Tones)
- Kool Tak™ Clear Foam Pads ¼” x ¼ x 1/32” Thick (51)
- Kool Tak™ Clear Foam 3/16 x 1/16” Roll Thick, 11” (2)
- Kool Tak™ Premium Extreme ½” Tape, 11” length (3)
- White plastic bracelet blank or pre-owned bracelet
- Adhesive-backed crystals (22)
Tools
- Kool Tak™ Layer Plus Tool
- Scissors
Instructions:
1. Place the ½-inch Kool Tak™ Premium Extreme tape around the center of the plastic bracelet and then add the tape to the top and bottom halves of the bracelet. Make sure the tape goes right to the top and bottom edges of the bracelet. Remove the protective liner on the tape to expose the sticky tape.
TIP: Make sure to apply the dull side of the foil to the sticky side of the tape!
2. Randomly rub the copper foil on the tape. Cover about 90 percent of the tape with the copper foil.
3. Rub the dark brown foil on the remaining 10 percent of the tape.
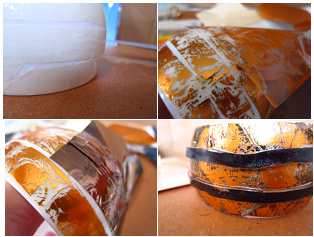
4. Place the 3/16 x 1/16-inch thick Kool Tak™ Clear Foam around the upper part and lower part of the bracelet. Because this bracelet has a rustic look, apply the foam in an uneven pattern. Randomly cover the foam with the black foil and then use the dark brown foil on any remaining exposed areas of the tape.
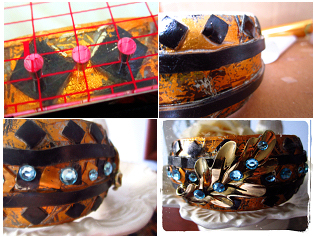
5. Use the Kool Tak™ Layer Perfect Tool to mark where you will apply the ¼ x ¼-inch Kool Tak™ Clear Foam Pads. Use a fine-tip black marker in the Layer Perfect Tool holes to mark where you will place the squares. The sample in this project used a measurement of every other hole in the Layer Perfect tool. The equally-spaced Clear Foam Pads will give the bracelet a professional-looking finish.
6. Apply the ¼ x ¼-inch Kool Tak™ Clear Foam Pad Squares in a diamond pattern around the top and bottom of the bracelet. Randomly place the black foil on the squares and then use the copper foil to cover any remaining exposed areas on the squares.
TIP: Your crystals do not have an adhesive on the back? Smear craft glue on the back of the crystal to attach the crystals to the bracelet.
7. Apply Clear Foam Pads in the center of the bracelet. Apply black foil on every other square and the copper foil on remaining squares. Add blue-colored sticky-back crystals to the foiled squares. The sticky-back crystals are applied randomly on the foiled squares and are not placed in a perfect line.
8. Use the ¼ x ¼-inch Kool Tak™ Clear Foam Pads to attach the focal piece to the front of the bracelet. You can use old jewelry pieces such as jewelry pins and necklace pendants from flea markets and thrift stores as the focal piece to your bracelet. You can also use new jewelry pendants as the focal piece for the bracelet too.
Project designed by Carol Heppner
 Carol Heppner is a professional craft designer and craft-industry consultant. She is an author, mixed-media artist, and photographer. Her work has appeared in national publications, on product packaging and websites. Carol’s artwork and photographs have appeared in national art shows, galleries, magazines, books, products, tradeshow booths and advertisements. Carol is co-owner of Bella Crafts Quarterly™, a free-online craft magazine and on the Editorial Advisory Board of Scrap and Stamp Arts.