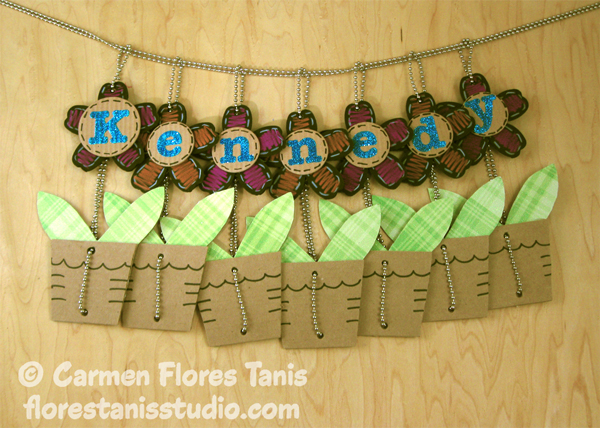
 Here’s a cheerful project that will keep a little girl’s hands busy while making a sweet personalized garland for her room. My little niece has a new room with freshly painted walls which are just begging to be decorated. And I thought that this would be a fun summer craft to make outside with her – we’d be inspired by nature and also wouldn’t mind any accidental glitter spills!
Supplies:
Kool Tak™ Premium Extreme Tape – 2 1/2″ x 27 yards
Kool Tak™ Ultra Clear Adhesive Sheet – 8” x 10” (1)
Kool Tak™ Ultra Clear Tape – 1/4″
Kool Tak™ Sparkles Bonus Pack – Blue
Kool Tak™ Clear Adhesive Discs – 1″ diameter
Kool Tak™ 3D Foam Pads – 3/8″ diameter x 1/16″ thick white
Cardboard
Black Foam Core
Green Patterned
Paper Ball Chain and Connectors – 16″ per flower stem and extra for hanging
Tools: Westcott Brand scissors, black permanent marker, colored pencils, needle tool, die cut machine and dies (circles, alphabet, flower shapes, large heart), glitter tray, heavy duty hole punch
Instructions:
1. You will be constructing one flower for each letter of your chosen name. Use the die cut machine to cut one cardboard circle per flower. Die cut letters from the sheet of Kool Tak™ Ultra Clear Tape . Peel the red release plastic liner from the letters and adhere the letters to the cardboard circles sticky side down. (**Tip – use the needle tool to help remove the red release plastic liner.) Smooth down.
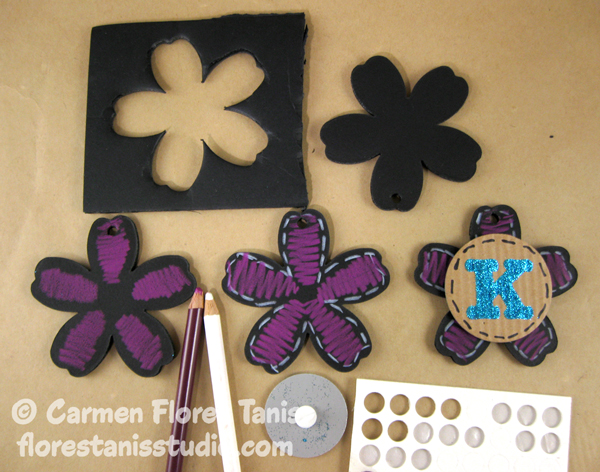
To keep things nice and neat, put a piece of paper on the bottom of your glitter tray before you start glittering. Put a cardboard circle on the tray and peel away the white paper release sheet to expose the adhesive. Sprinkle with blue glitter from Kool Tak™ Sparkles Bonus Pack . Press down on the glitter with your finger so that it adheres well then tap away the excess glitter. Pick up the paper carefully and use it to funnel the extra glitter into an empty plastic container. Repeat for the remaining cardboard circles. 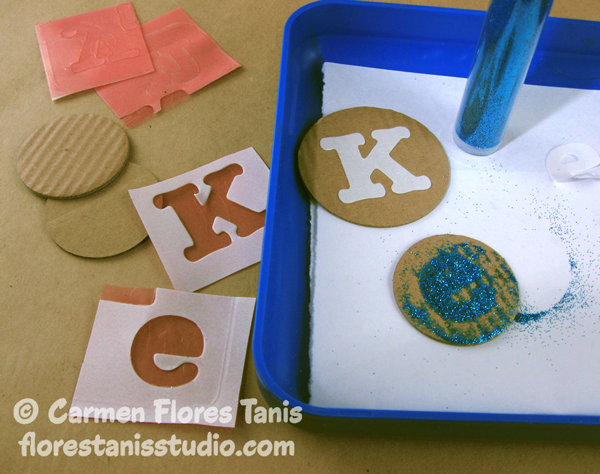 2. Die cut flower shapes from the black foam core. Punch a hole in each flower for hanging. Color each flower with colored pencils. Adhere a glittered cardboard letter circle to the center of a flower shape with a round Kool Tak™ 3D Foam Pad . Add detailing to the cardboard circle with the black permanent marker. Repeat for the remaining flower shapes.
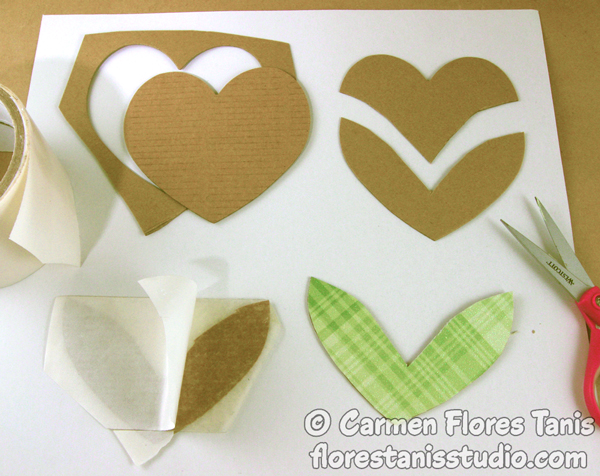
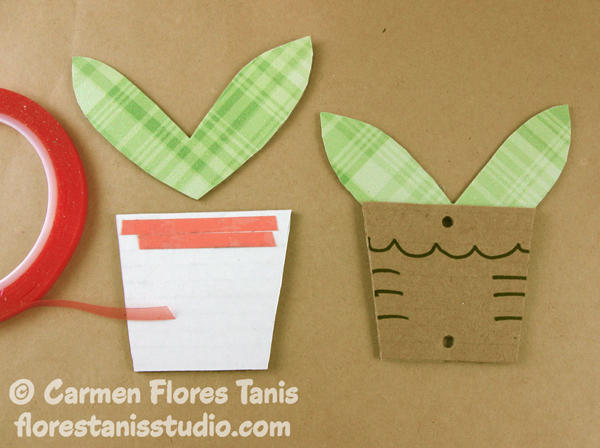
  3. To make the leaves, die cut large hearts from cardboard. Trim with scissors into a petal shape. Apply a piece of double sided Kool Tak™ Premium Extreme Tape and peel the white release liner to expose the adhesive. Apply a piece of green patterned paper and trim to size.
  4. Use scissors to cut flower pot shapes from cardboard. Use strips of 1/4′ Kool Tak™ Ultra Clear Tape to attach the green leaf shapes to the back of the flower pot shapes. Punch holes at the top and bottom of each cardboard pot shape and add detailing with black permanent marker.
  5. Assemble each flower stem by threading a 16″ length of ball chain through a black foam core flower shape and a cardboard pot shape as shown. Secure in place with Kool Tak™ Clear Adhesive Discs .
 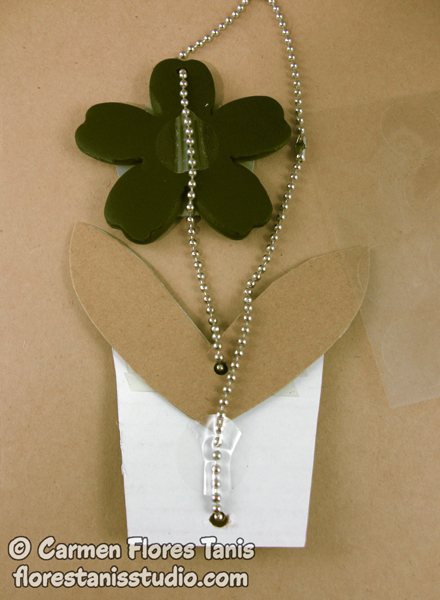 6. String the individual flower stems on a length of ball chain and hang on the wall.
 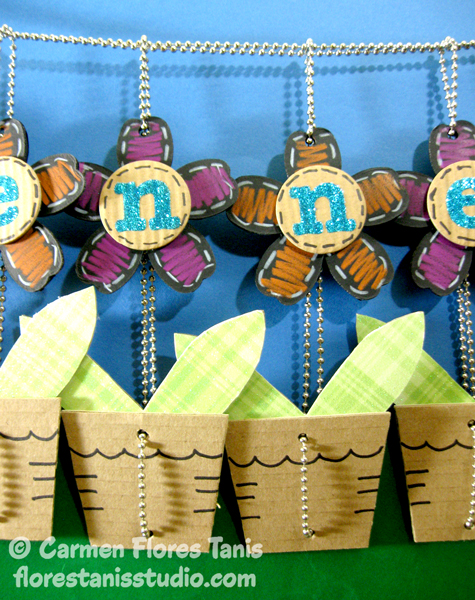 You can personalize this garland for any little girl by using her favorite colors and shapes. You can also adapt it for any child by using animals and geometric shapes instead of flowers. It’s a fun way to personalize any kid’s room!


WOW Carmen! This is such an original idea using the chains instead of rope or ribbon. Super fun project!