We just completed a 6,000+ mile trip to the West Coast and of course, I took photos all the way. No one will ever know I was on this trip because there isn’t a single pic of me. There are, however, some really cool photos of everything we saw.
I love the Thunderbird restaurant near the entrance to Zion National Park (the prettiest place on Earth) . They have a unique history (the owner was making a sign during the depression years and using scrap. He didn’t have enough space to write Home Made Pies, so he shortened it to Ho-Made Pies.) and serve up some of the best food anywhere. Their pies are a specialty, although I think the French Toast gives those pies a run for their money.
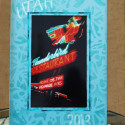
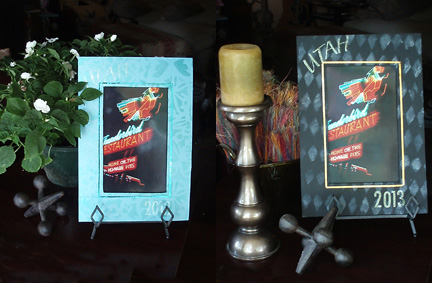
I fell in love with this photo when I downloaded it and wanted to showcase it in my home. Since the colors are so bright and contrasty, I knew I couldn’t stick with my usual dark colors with a tendency to go toward browns and deep rust colors. I also wanted to be able to use this photo year-round, so I made a double duty frame: black on one side, blue on the other, so I could just swap the colors whenever I wanted. I also wanted to name and date the photos without the words and numbers taking any thunder away from the photo. Naturally, Kool Tak™ came to the rescue.
Here’s how I did it.
Supplies
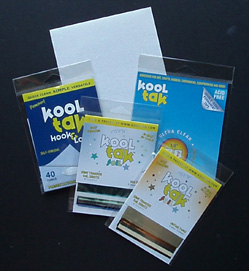
Kool Tak™ Ultra Clear Double-Sided Tape, 1/8″
Kool Tak™ Hook and Loop Ovals, Self-adhesive
Kool Tak™ Shiny Transfer Foil Sheets, Vintage Tones
Kool Tak™ Shiny Transfer Foil Sheets, Sea Tones
Kool Tak™ Sparkly Adhesive Sheet, Clear
Kool Tak™ Non-Stick Crafting Sheet
Die Cut Alphabet and numbers dies
Stencil Sheets
Black foamcore board
Card stock, 12″ X 12″
Craft Paint, Gray and a color to blend with your card stock
Photos (two of the same image)
Tools: Craft knife, scissors, sponge, tape
Instructions
Cover your work area with the Kool Tak™ Non-Stick Crafting Sheet.
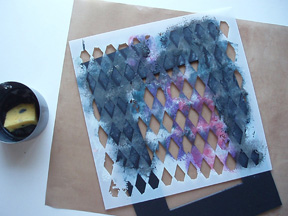
Cut two pieces of black foamcore board 2″ larger all around than your photo. Stencil one of the black foamcore boards with gray paint. Embellish the other board by adhering colored card stock to it using Kool Tak™ Ultra Clear Double-Sided Tape. Create your frame window by trimming out the center of both boards so that the opening is 1/4″ smaller all around than your photo. I went with a rectangular shape but you can make the opening any shape you like i.e. oval, square, scalloped.
Stencil the other board in the color of your choice. I chose a bright color so as to have two very different looks.
Cut words and numbers out of the Kool Tak™ Sparkly Adhesive Sheet using your favorite dies or punches. The sparkly sheets are great because they are self-adhesive, clear and the glitter is embedded into them so there is no glitter residue. Adhere words to top and numbers to bottom of each frame.
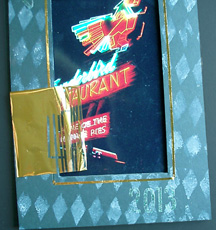
Create a border all around the frame window by adhering the Kool Tak™ Ultra Clear Double-Sided Tape 1/4″ from the sides of the window of each frame. Remove the red liner and cover the tape with Kool Tak™ Shiny Transfer Foil – Copper on the black frame and with your foil color of choice on the other frame.
Attach photos to back of each board with tape. Apply Kool Tak™ Hook and Loop Ovals to the back of one piece of foamcore board. Remove release pieces and adhere the frames back-to-back.
Display the Kool Tak™™™™ Double Duty Frame on an easel, flipping the photo seasonally.
That’s it. Easy as pie. Easier than Ho-Made pie!

Love this idea to dress up special photos!
You are so creative, Candice. This is an awesome frame, and who would believe it is made out of foamcore?