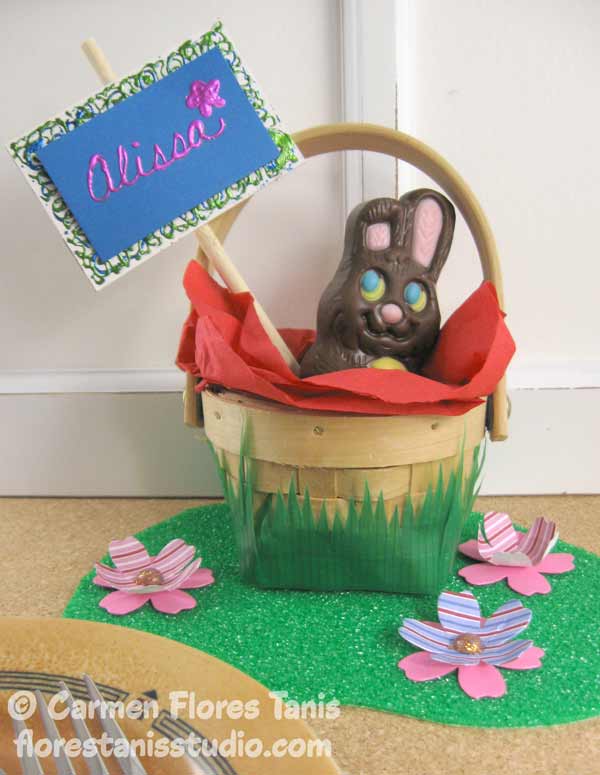
This little Easter basket is a fun decoration for your Springtime table. Make several to help with seating arrangements and then afterwards your guests can take them home as gifts with a sweet treat inside.
Here’s how:
Materials:
Kool Tak™ Ultra Clear Double Sided Tape – 1/8” x 16 yds
Kool Tak™ Premium Extreme Double Sided Tape – 1/2″ x 27 yds
Kool Tak™ 3D Adhesive Foam Pads – 1” x 1/2” x 1/8” thick
Kool Tak™ Clear Adhesive Foam Pads – 1/4” x 1/4” x 1/32” thick
Kool Tak™ 3D PVA glue with fine tip
Kool Tak™ Shiny Transfer Foil Sheets – “Aquarium”, “Mardi Gras”
Mini basket – (available at craft stores and here)
Chopstick
Green plastic sushi grass
Tulip® Beads in a Bottle™ paint – gold glitter
Craft foam sheet – textured green grass
Card stock – assorted pinks, blue
Chipboard – white
Chocolate bunny
Paper napkins
Tools:
Needle tool, kraft knife and cutting mat, scissors, pencil, wire cutting pliers, small flower paper punch
Instructions:
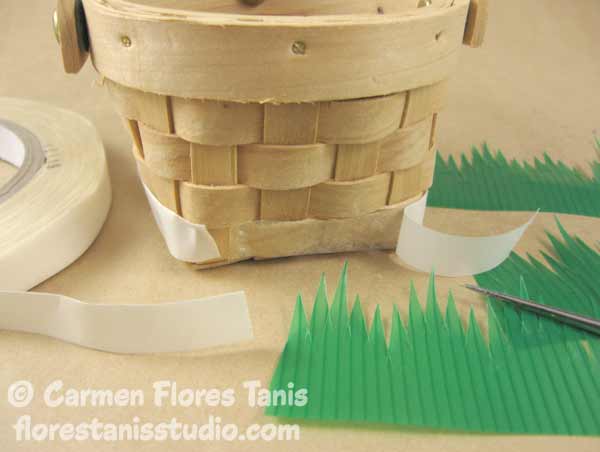
1. Adhere a strip of Kool Tak™ Premium Extreme Double Sided 1/2” Tape around the bottom edge of the mini basket. Peel the white paper release tape and adhere green plastic sushi grass.
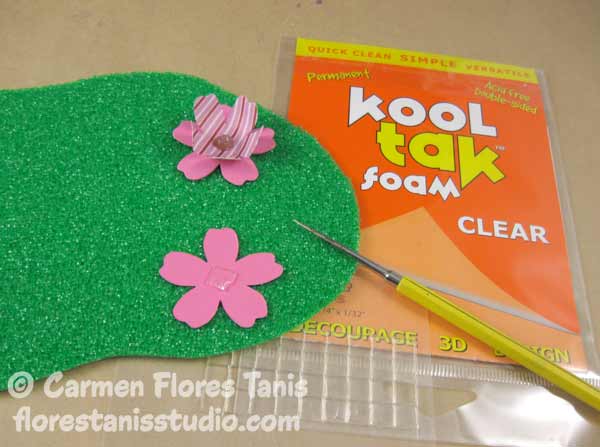
2. Cut a kidney shaped piece from the green craft foam sheet. Punch small flowers from the pink card stock. For each flower, adhere one paper flower to the green foam sheet with a Clear Adhesive Foam Pad. Bend the petals of another paper flower upward. Attach this shaped paper flower to the center of the paper flower already on the green foam sheet with another clear adhesive foam pad. Dot the center of the flower with a drop of Beads in a Bottle paint. Repeat to make two more flowers. (**Tip – use the needle tool to help remove the release liner from each foam pad.)
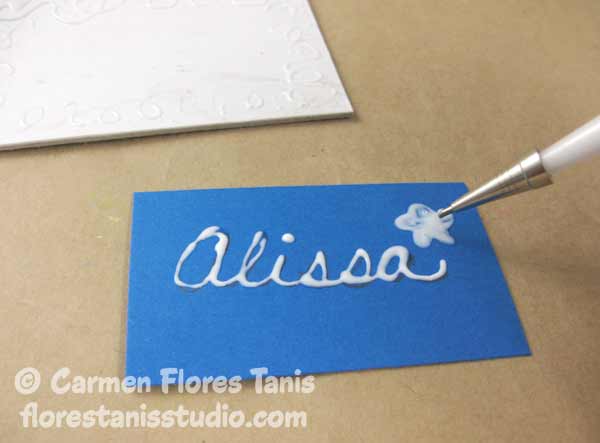
3. Cut a 3” x 2” piece of white chipboard. Cut a 2 1/2” x 1 1/2” piece of blue card stock. Fit the fine tip on the 3D PVA glue bottle. Squeeze the bottle gently as you draw squiggles on the white chipboard. Use the pencil to write your guest’s name on the blue card stock piece. Trace the letters with 3D PVA glue. Let the glue dry until it turns clear.
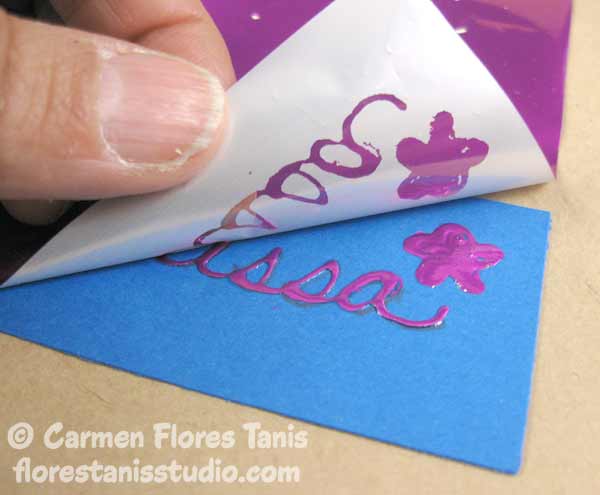
4. The shiny transfer foil sheets are each basically a clear plastic release sheet with a dull side and a shiny side. Select a pink foil sheet and press it shiny side up / dull side down onto the adhesive on the blue card stock and rub well. Lift and peel off the foil shee to reveal 3D detailing. The clear plastic release sheet lifts off leaving the shiny foil adhered to the blue card stock.
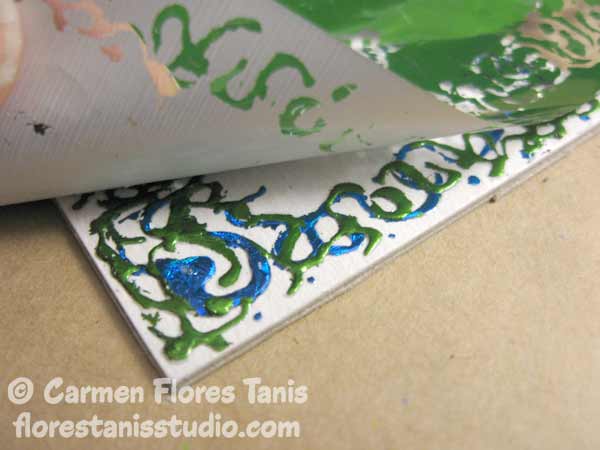
5. Apply blue foil to the glue on the white chipboard piece. (**Tip – You can use every little bit of the foil transfer sheet until all you have left is the clear release sheet.) To add a second color to the white chipboard piece, add more squiggles with the 3D PVA glue then apply green foil when the glue turns clear.
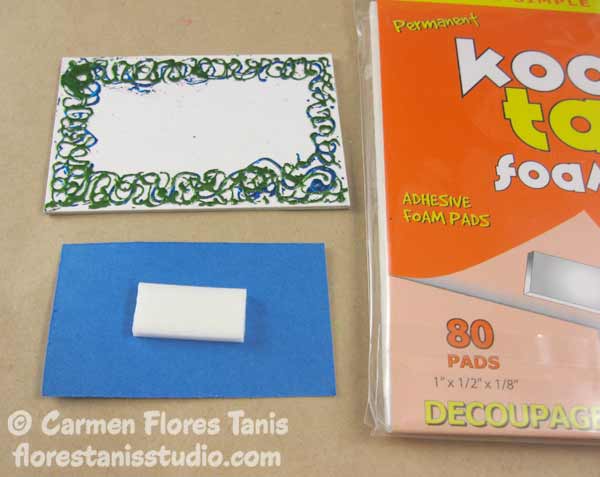
6. Attach the blue cardstock piece to the white chipboard piece with a 1” x 1/2” Adhesive Foam Pad.
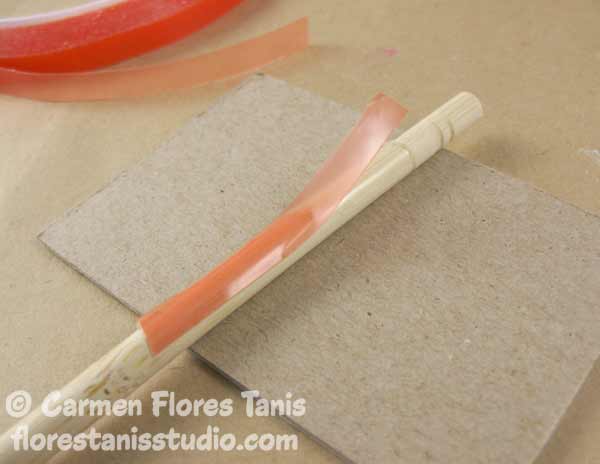
7. Shorten the chopstick two inches using the wire cutters. Attach the white chipboard piece to the chopstick with Ultra Clear tape.
8. To finish, put a paper napkin in the basket and nestle the chocolate bunny inside. Place the basket on the green craft foam and add the name tag.
You can find mini baskets at the craft store in different shapes so mix and match them for your table. And you can find plastic sushi grass at Japanese markets in the kitchen utensils section. Try adding a few tiny toy ducks too for a different Spring look!

